Last night I tested an aluminum tank that made it to within 5PSI of my goal, 500PSI. It burst in the end cap. So I set out early this morning to try and make some sturdier end caps. the ones that failed were 6061 T0 0.080" thick. So I thought I'll try it with 6061-T6 0.080 thick. A tiny bit stronger. (Its what I had on hand) So I got up at 5:30 am and made an end cap, or tried... The -T6 is a lot stronger and in trying to form the end caps the 1/4" grade 8 bolts holding the fixture together failed in mass at about 800 PSI. not much of a dome in the T6 at 800 PSI. So at lunch today I went by Marshals hardware and bought a bunch of grade 8 3/8" bolts. When I got home from work this evening I started drilling out the steel fixture to take the 3/8" bolts. I started with the 1/2" "Oh my god" strong hand drill, it jammed in the third hole and snap ed off in the fixture. (I'm getting better at this while I was at the hardware store at lunch I bought two extra drills of the proper size.) So I extract the broken bit and move to the drill press. The drill press is not a big one and it's marginal for drilling 3/8" holes in 1" of steel. I finally finish the fixture, redrill the partially formed T6 plate and reassemble all 36 bolts.
Then out to the hydro pump and start pumping at 250 PSI the o-ring fails. I disassemble the fixture and discover I'd pinched the o-ring on assembly. When I disassemble the fixture I get soping wet as the fixture traps just enough water to surprise you and make all the neighbors still brave enough to come vist think I have an incontinence problem. So dig in the o-ring box and discover that the extra fixture o-ring is not in the o-ring box...... So I figure that I'll try the old o-ring properly assembled. So I set the oring in the grove correctly, careful not to pinch it and reassemble. Each assemble /disassemble step requires about 15 min as there are 36 bolts and the fixture holes are deliberately snug. Reassemble and pump up to about 1000 PSI when the fixture assembly makes a lond bang and starts leaking water. So Back inside and disassemble only to discover that the T6 failed at the edge and failed to make a dome. So I have to use T0, alas I need thicker than 0.080 which is the thickest T0 I can easily find from aircraft spruce. My favorite metal supplier IMS does not sell any T0 aluminum. I started the day with a plan and a fantasy about making two new end caps and bringing them to Bob to weld this evening. At the end of the day I not only have not made any progress, but I've also discovered that my plan of attack is no longer workable. 18 hour day zero forward progress... building hardware is hard.
Wednesday, January 31, 2007
Tuesday, January 30, 2007
Aluminum Tank Test.
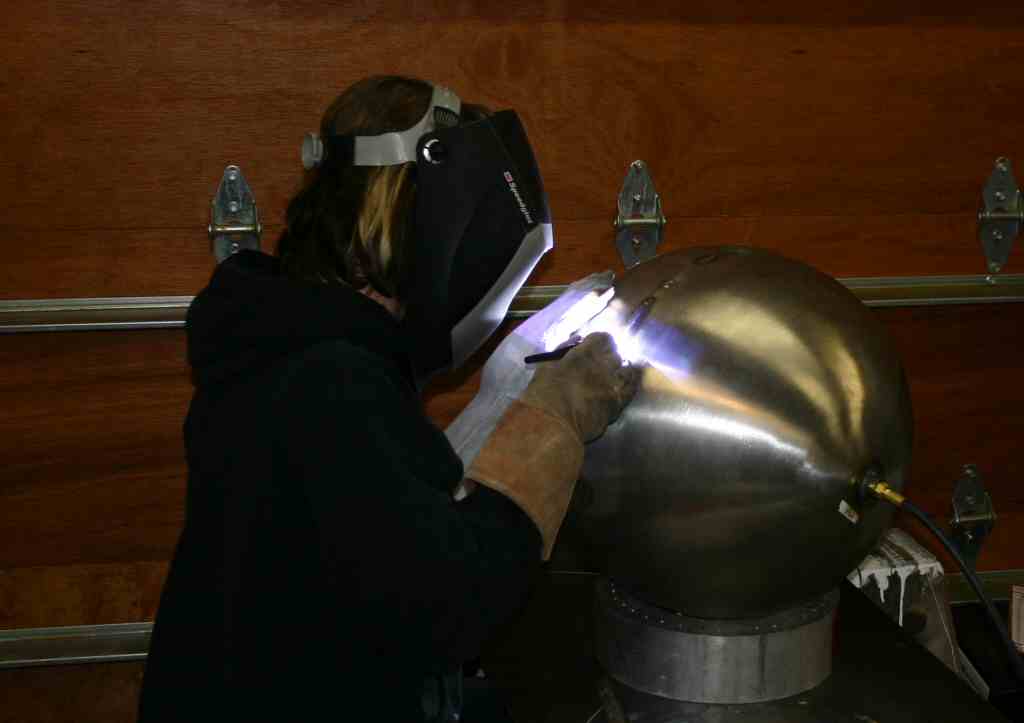
Carl at FloMetrics recommended a local gentleman named Bob to help us with some aluminum welding. Tonight my son went to his shop and held things while Bob welded up an aluminum tank with our hydro formed end caps. The quality of the work was very good, and we tested the tank this evening.
The Tank details...
I'm very happy with this test. This is the exact tank design that is in my vehicle model
Bob was going to weld up a pair of tanks, but I think I'm going to have him hold off on the 2nd tank until I can hydro form some heavier endcaps of slightly thicker material. So we now have working valves, and a workable tank. Next up an ignitor, thrust chamber and paperwork.
The Tank details...
- Predicted Tank weight 5.6 Kg
- Actual tank weight (The end caps ar a bit less deep) 5.25Kg
- Predicted burst pressure: 558 PSI.
- Actual tank burst 495 PSI. (End cap was too thin from forming.)
- Calculated Tank volume disreguarding 1/2 the end cap volume to account for shallower than spherical end caps: 51.3 liters
- MR 10.78

I'm very happy with this test. This is the exact tank design that is in my vehicle model
Bob was going to weld up a pair of tanks, but I think I'm going to have him hold off on the 2nd tank until I can hydro form some heavier endcaps of slightly thicker material. So we now have working valves, and a workable tank. Next up an ignitor, thrust chamber and paperwork.
Saturday, January 27, 2007
Normal Metal Tanks...
If I can't get my spectra tanks to work, I need a backup plan, toward that end we are fabricating two possible tanks. A Tank made out of aluminum thinwall tubing and hydro formed end caps. I spent Saturday fabricating end caps that will be welded to the aluminum thinwall tubing.
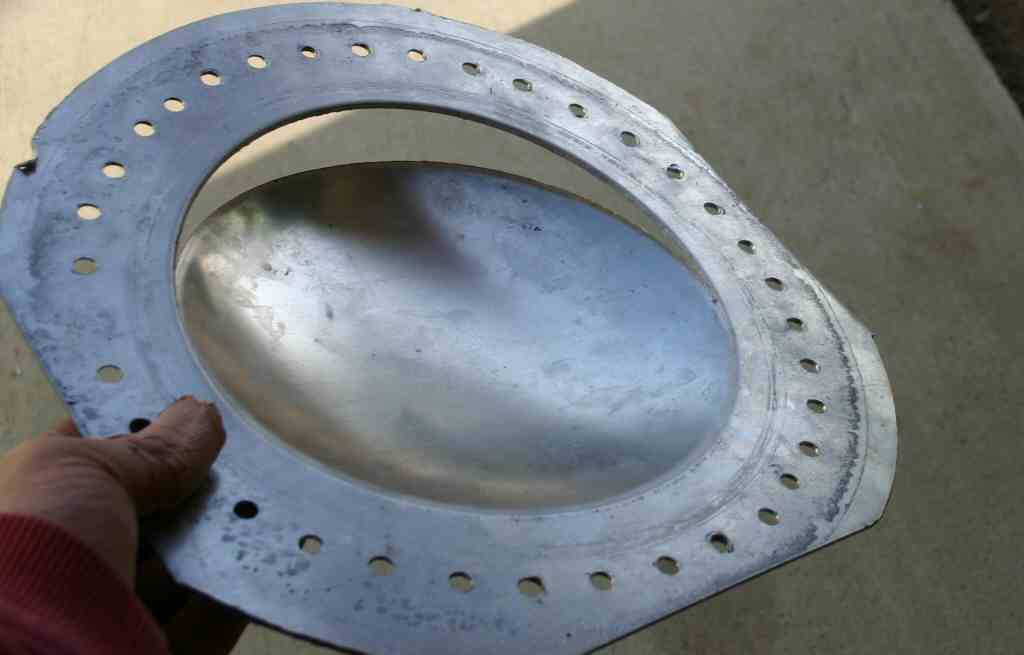
Here is a cap being formed in the forming fixture:
After pumping about 600 PSI water into the fixture the pressure is releived and the endcap is removed and put on the mill, indicated for center and then machined out of the blank.
The result is :

My son welded up the stainless hemispheres, and we tested these...

The first test sprang a leak at 450PSI in the weld, we patched that and it sprang a leak at 590 PSI, we patched that and it sprang two leaks at 710 PSI. All leaks so far have been in the weld area. The theoretical burst for this tank should be between 800 and 1300 PSI depending on if you give any stress credit for stretching the tank and work hardening it. So 710 is close to this value. The MR of this 18" tank is about 7.6 . The aluminum tanks we will weld up Sunday have a theoretical burst of 550 and an MR of 9.6.
Here is a cap being formed in the forming fixture:

After pumping about 600 PSI water into the fixture the pressure is releived and the endcap is removed and put on the mill, indicated for center and then machined out of the blank.

The result is :

My son welded up the stainless hemispheres, and we tested these...
The first test sprang a leak at 450PSI in the weld, we patched that and it sprang a leak at 590 PSI, we patched that and it sprang two leaks at 710 PSI. All leaks so far have been in the weld area. The theoretical burst for this tank should be between 800 and 1300 PSI depending on if you give any stress credit for stretching the tank and work hardening it. So 710 is close to this value. The MR of this 18" tank is about 7.6 . The aluminum tanks we will weld up Sunday have a theoretical burst of 550 and an MR of 9.6.

Thursday, January 25, 2007
A plea for paperwork help.
I have negative amounts of tact and diplomacy when dealing with bureaucracy. If I think something is Bu****it I say so. I'm coming to realize that unless I get someone other than me to deal with the AST I'm not going to be successful. So what I'm looking for someone to do the following:
If anyone is interested in working on this as a paid consultant please contact me. If I've already talked to you there is no need to respond again.- Help me wade through the experimental permit process.
- Help me figure out exactly what technical supporting docs I need to prepare.
- Present this to the FAA/AST in my behalf.
To contact me send E-Mail, you will have to answer to my SPAM filter.

Sunday, January 21, 2007
48" long wound FTC test
I tested the 48" wound florescent tube cover tank to failure this morning. At around 1500 PSI it started weeping around the o-ring. At between 1900 and 2000 PSI the pins on the aluminum end cap failed. All the pins were sheared off, and none of the spectra was even torn. I'll post detailed pictures later.
(The tank was 337 gms and held 1.65 Liters of water. for a MR >5 at 1500 PSI)
(The tank was 337 gms and held 1.65 Liters of water. for a MR >5 at 1500 PSI)
Saturday, January 20, 2007
 I got up this morning and hydro tested my 3" wound tank. It failed at 200 PSI in dramatic fashion. It shattered into a bunch of little pieces.
As you can see in the picture on the left the PTEG tube has lots of little cracks. After this failure I suspected that maybe something was wrong with my initial small scale test with the Florescent light tube cover. So I retested that, again the fitting leaked and again it held to 1500 PSI. So I suspect that the PETG tube and the FTC tube were made of different stuff. I've decided to disassemble the old small FTC tube, fix the fitting leak and try again. I'm letting the oring overwrap reenforcement dry and when that is done I'll wind another tank and test it on Sunday.
Just in case my spectra tanks don't work out I'm also working on lightweight aluminum tanks. I built a hydroforming fixture out of a large chunk of 12" diameter Aluminum and a 12" diameter steel cover plate.

The frist try at using this fixture was ok, but not great. the only Aluminum I had was 6061-T651 so it was hard and did not yeild well, I've ordered som 6061-T0 and we will see how that works. The resulting end cap from the -T6 was usable, but shallower than I would like. It failed around the edge of the fixture, so my guess is that I need to radius that part of the fixture a bit more. I send E-Mail to two metal spinning companies asking for quotes on having them make 8" hemispheres and I've gotten no answer.
Friday, January 19, 2007
Thanks to all for the help.
I started this blog because I'd enjoyed reading about other projects from the engineering perspective. I'd hoped that others would enjoy reading this. What I did not expect is that I would receive help from my blog readers. The examples of this are numerous. I've had two different people run PET LN2 experiments and e-mail me their results. John Carmack of Armadillo has made numerous helpful comments. Just this week my son was working on my wound tank o-ring seal and went to visit "Real Seal" looking for Lox compatible seals.
My son discovered that Kevin at Real Seal is a reader of my blog. My son has been back once more to get a slightly different size and the people at "Real Seal" have been very helpful. I insisted that he pay them for the O-rings he picked up, but based on what McMaster Carr charges me for O-rings I suspect that the rings he got from Real Seal were sold to us at below market prices.
Using these new O-rings we put together another 3" wound tank. We finished it tonight and its holding water. I glued the end of the spectra down and I have to let that glue dry. We will pressure test the assembly on Saturday. I'll have pictures of the result as well as some pictures of our hydroforming fixture for making 8" aluminum end caps.
Some people may wonder why I'm spending all this effort on tanks. It's not very sexy and making hot flamey shock diamonds is much more showy, but the tank mass also appears in the rocket equation and if I can reduce the dry mass of my tanks by 50% its the same as adding 30 seconds of ISP to my rocket engine.
Best Wishes for Spacex
Some time in the next week it looks like SpaceX will try a static fire then a launch. I hope the mission is a 100% success! We need more successful private space ventures.
Update SpaceX will not fly till mid February.... something wrong with the 2nd stage TVC actuator.
Update SpaceX will not fly till mid February.... something wrong with the 2nd stage TVC actuator.
Monday, January 15, 2007
A Widget for the Xprize Cup fans...
I was working on schedules and thought I need a reminder of how long I have left. So I wrote a simple little MFC application that counts down till the xprize cup .
.
If you want a copy of the application it is here. Beware this is zip with an exe file in it. In general it is a very bad idea to download an unknown EXE file from someone you do not know and run it. I would recommend that you virus scan this before using it. For those that want the source code it is here....
 .
.If you want a copy of the application it is here. Beware this is zip with an exe file in it. In general it is a very bad idea to download an unknown EXE file from someone you do not know and run it. I would recommend that you virus scan this before using it. For those that want the source code it is here....
Thursday, January 11, 2007
Tonegowa Servo Success...
Tonight I tested a valve based on the tonegawa PS-050 servo. It's 890 grams and seems perfect. I'm posting a video of the 350 PSI LN2 test and it works really well. The video is at here. The mechanical set up for the tested valve had a few issues. So my son built a second valve based on the Tonegawa it is 781 grams and works just as well. I think we have our first flight weight bit of actual XPC hardware.
Sunday, January 07, 2007
Leaking O-rings explained
I spent all day Saturday working on the o-ring seal problem with my tanks.
I'm 90% sure I know what the problem is.
After trying everything under the sun with respect to o-rings sizes grove depths etc...
I did an experiment, I built a tapered hollow aluminum plug and an aluminum ring that goes on the outside. I heated the PETG tubes and slid them over this tapered plug. I then filled the tube and a plug with Ln2 and let them cool. (To make them shrink)
I boiled the ring that goes over the outside in water. (To make it expand)
I then drove the heated ring over the outside of the assembly.
This explanation sounds simple, but I machined the plug and ring diameter 10 or 15 times to get all the tolerances right.
I then let every thing return to room temperature.
I filled it with water and it still leaked.
Examining the plastic tubes under a magnifying glass I see that the extruded tubes have fine ridges or groves and these seem to make little capillary tubes that lets water seep through.
I'm now once again looking for clear, smooth plastic tubes.
Friday, January 05, 2007
3 working valves.
Tonight I LN2 tested three different valves.
ALL three worked to turn 350PSI LN2 on and off, even after LN2 soaking to get cold.
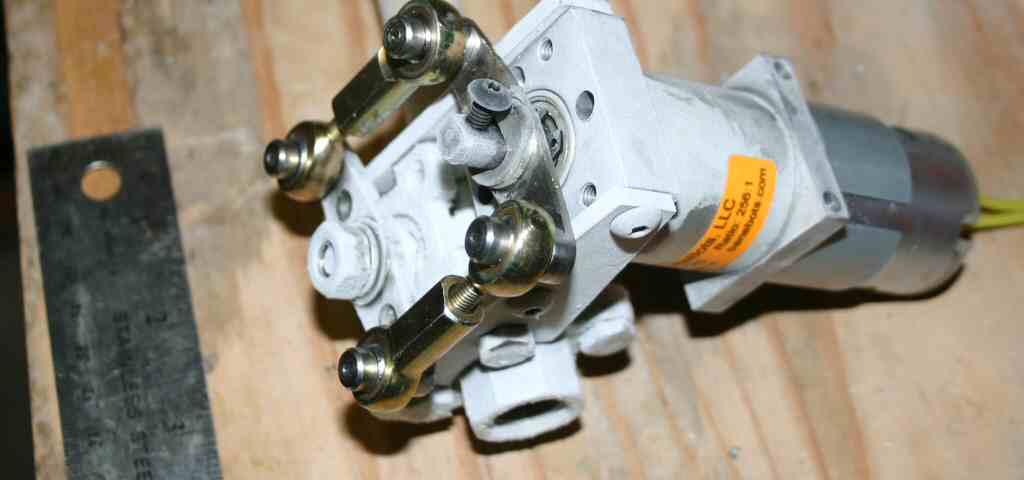
The first valve is a Home made valve made valve with a banebot 36mm 256:1 gear motor.
This valve is 900 gms.
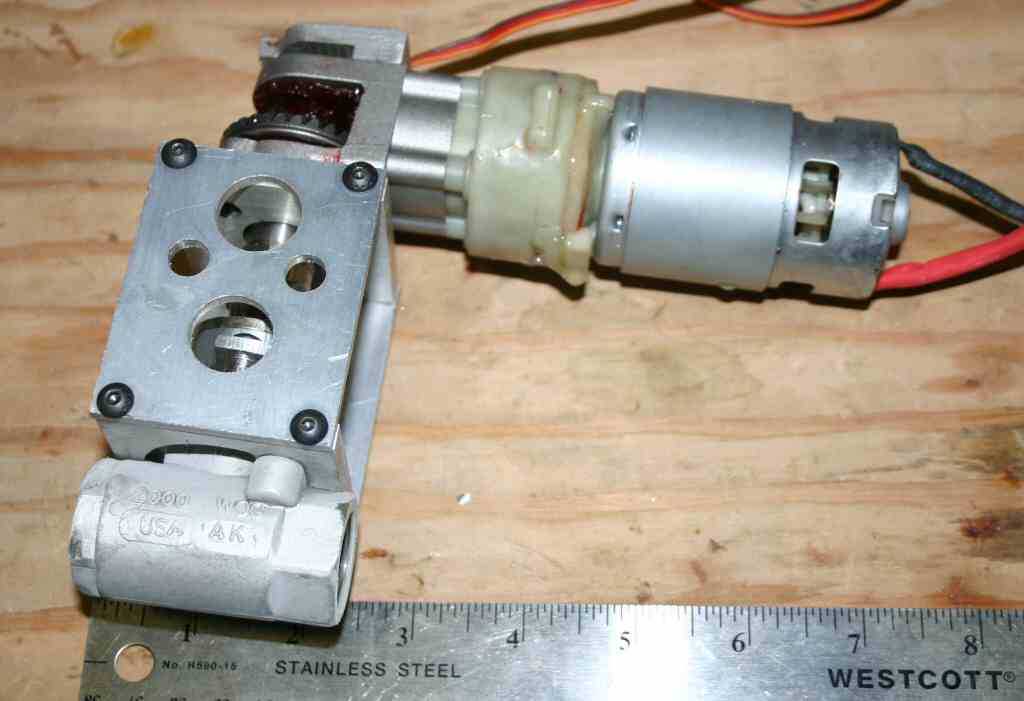 The second valve I tested is the Drill motor valve as previously described on this blog. 1.2Kg
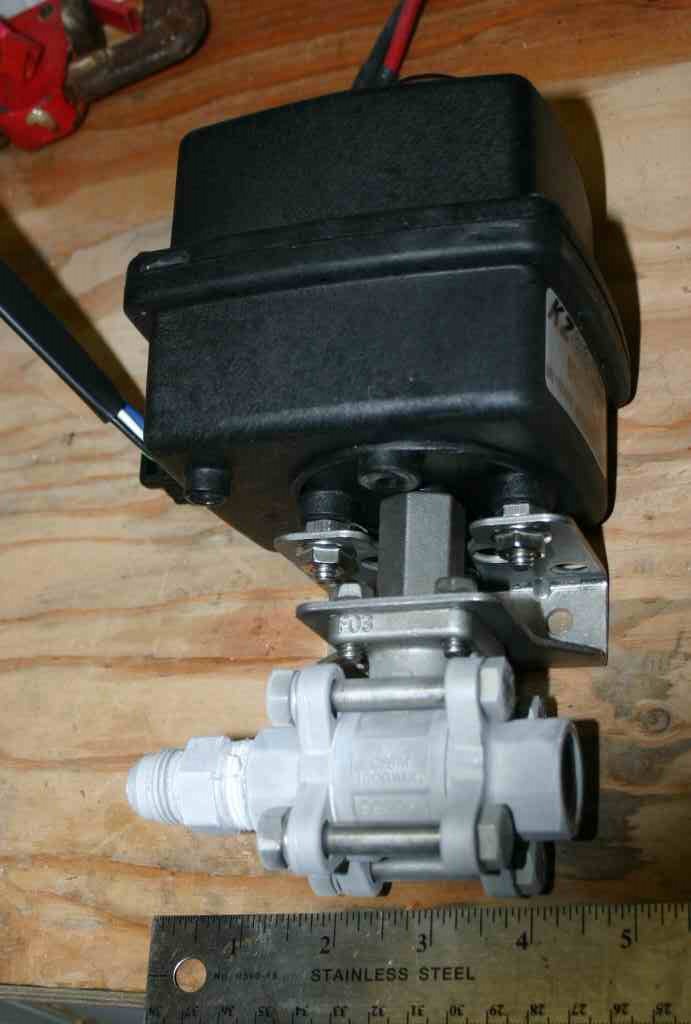 The Third valve I tested is KZCO actuated valve like Armadillo is using. It is a bit more than 2Kg.
Subscribe to:
Posts (Atom)